In this article:
1 What to make a bas-relief from?
2 Making a mold for casting plaster
3 How to make alabaster mixture for bas-reliefs
4 We fix the bas-relief on the wall
five Bas-relief based on molded forms
6 Bas-relief from ready-made figurines
7 Bas-relief – painting made of putty
8 Bas-relief of rag flowers
nine How to care
Let’s look at the most popular techniques step by step.
Believe me, this is much easier than you think! But first, we will explain some technical points regarding materials.
What to make a bas-relief from? Materials, tools
Let’s make a reservation right away: step-by-step technologies and a complete list of all components will be indicated below, in the corresponding section.
First, we will list only the main things you need to have:
- Alabaster;
- PVA glue;
- Finishing putty;
- Water.
This is the basis of the basics, but the auxiliary materials already depend on the type of drawings, which we will deal with here and now.
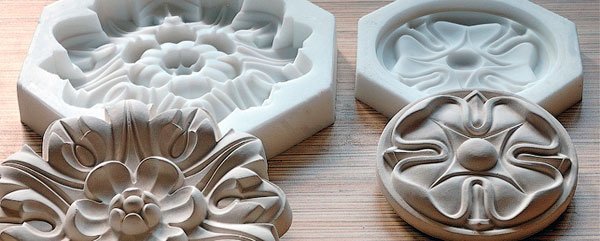
The most solid bas-reliefs emerge from the alabaster mass cast into molds.
Depending on the type of the latter, you can get absolutely any configuration of a convex pattern: fruits, flowers, shells and even classic capitals.
The main thing here is just to find a suitable shape, and the rest is just little things. Pouring gypsum is not difficult at all…
These are the decor elements that can be made in an hour. This is a nautical theme, and you are free to choose whatever you like.
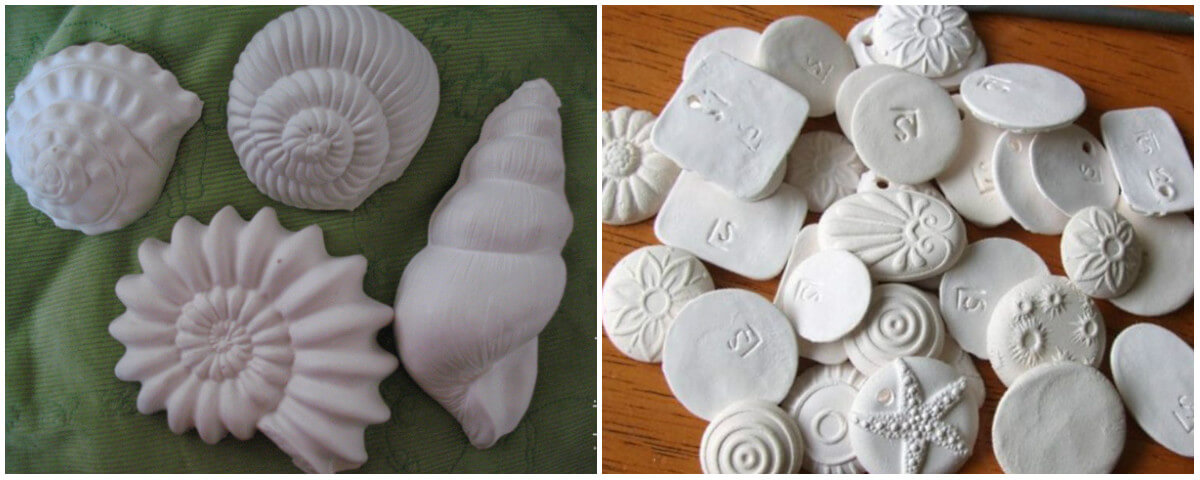
These seashells are poured with ordinary children’s pies for sand and attached to drywall sheets. And the framing of the frame is made with ready-made foam baguettes, which are usually attached to the joint between the ceiling and the wall.
It seems nothing complicated. Plaster is full in hardware stores. But where can you get a good shape?
Here you will have to upset, the choice is not so great: it is not enough to find a sample that is visually suitable in appearance, you also need to make the material withstand the heating of the gypsum during solidification.
Yes, yes, it heats up quite strongly and expands! Therefore, molds for making soap, for example, will not work. They will just burst and that’s it, since they are made of too thin plastic, not of the best quality.
You need something more substantial, such as the same plastic beads, and even better – silicone for baking. He is not afraid of any metamorphosis of the material, since it is designed for both high heating and tension.
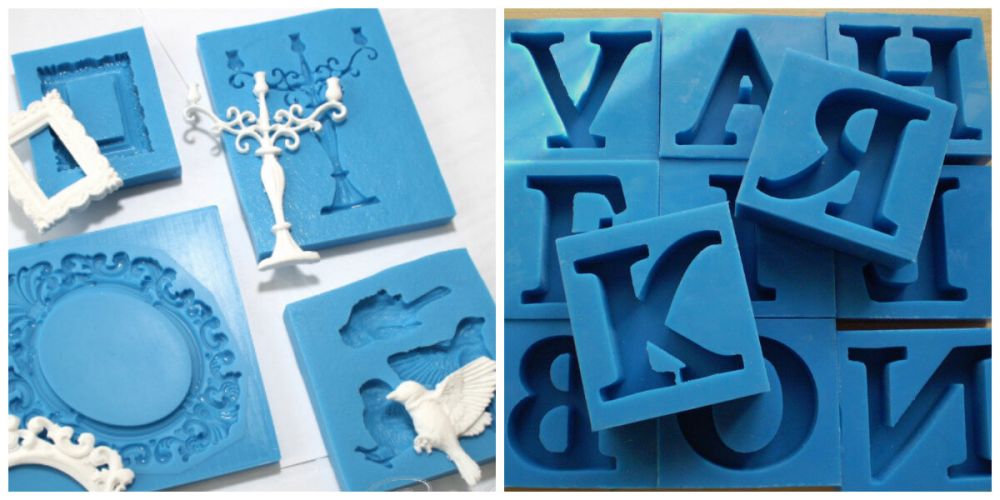
And most importantly, it is much easier to remove the finished product from it than from something hard.
With this type of bas-relief with our own hands, we figured it out superficially, and we will give you a detailed description of the process below, in the corresponding subheading. There you will also find a complete list of the necessary materials and accessories for each type of do-it-yourself paintings.
But besides the casting, there is other versions…
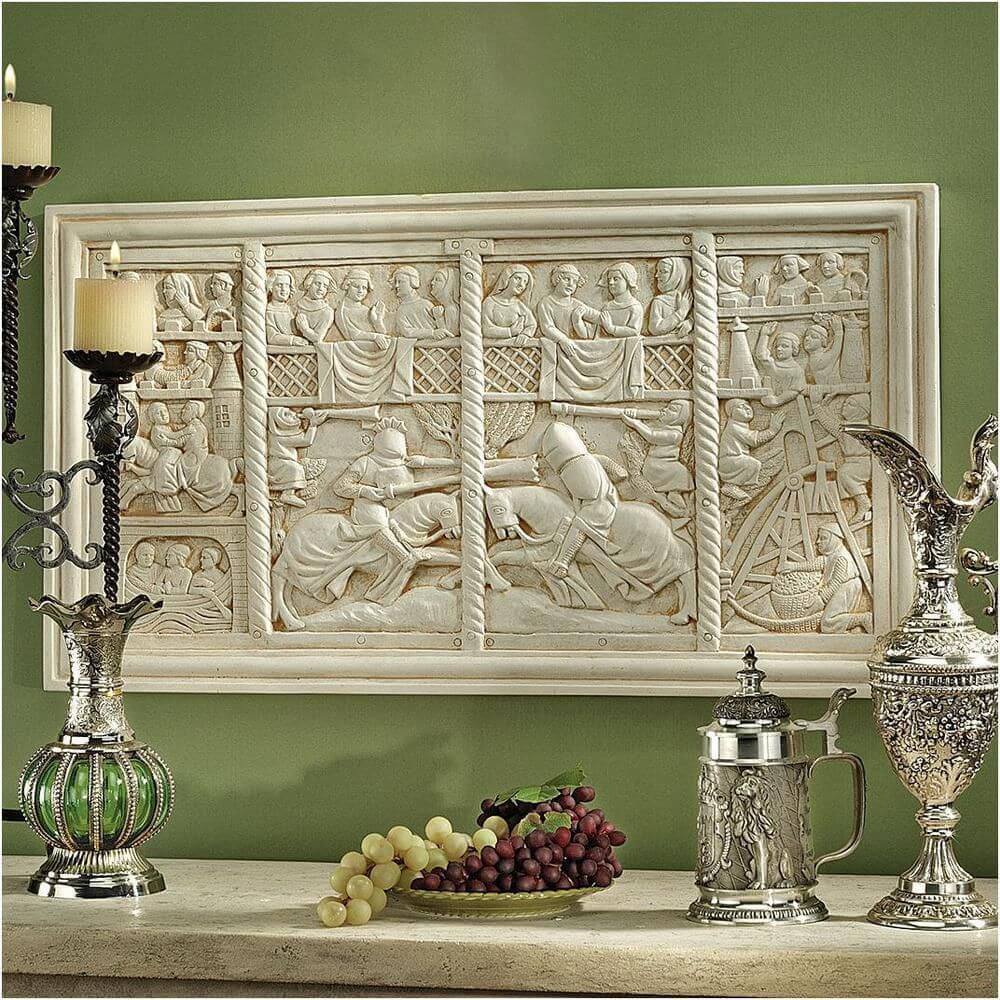
For example, a bas-relief from ready-made plaster figurines! Such a picture looks extremely expensive, but its final price cannot but rejoice.
Panels with various Greek mythical characters look especially beautiful, for example, Aphrodite or little angels.
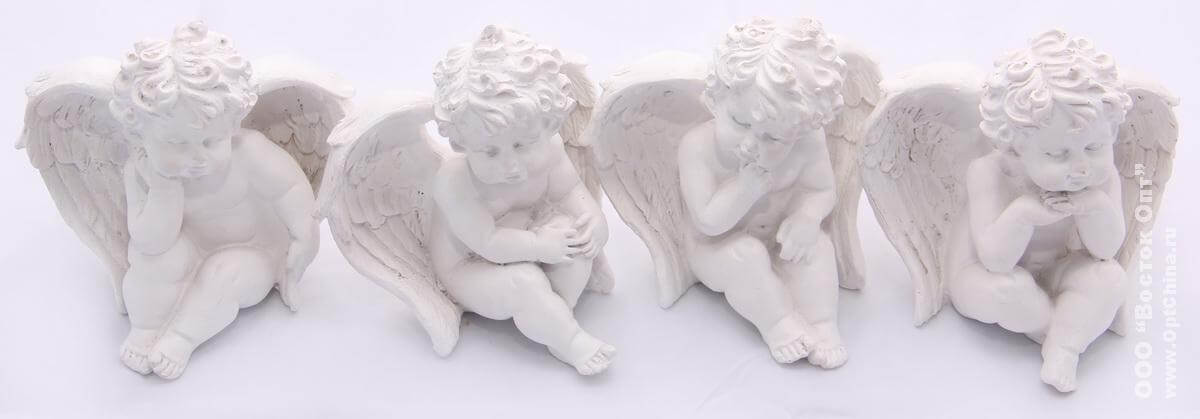
If you take these ladies from plaster, not marble, then such a purchase will not hit your pocket. But this is not all the options!
You can make a very cute arrangement using ordinary fabric flowers, the types of which are innumerable in gift shops. In addition, cones and other suitable shapes can be used. It will look like this:
The plaster bas-relief can be made removable, like an ordinary painting, or it can be made monolithic, as one piece with the wall, as you have already seen in the upper drawing with shells.
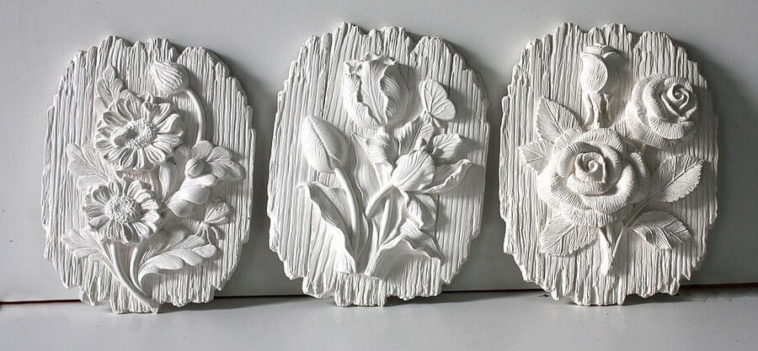
And if you know how to draw, then it will not be difficult for you to make a three-dimensional drawing straight from the putty, without using any aids and forms. But for this you need to have an artistic taste and the most elementary modeling skills. Here’s what you can get:
Or even so, but for this you need to be a master.
Here, in fact, are all the methods available to almost everyone. And now let’s get down to specifics and we will finally start doing, not dreaming!
Making a mold for casting plaster
If you can find a shape for everyone – different shells, fruits and bugs – and there is no point in making it, then for some details, such as grapes, it is easier to make the base yourself than to try to find it.
Of course, you can not cast them, but roll them out of putty, but it will look a little worse, since this material is more porous when it dries.
In general, with a certain skill, you can make any shape you want using ready-made figurines. Bought one, and then poured at least ten! And you want to give them, you want to make a panel …
Well, let’s get started. If we are talking about casting grapes, then you need to first roll it out of a thick putty mixed with PVA glue, in the proportion:
- Finishing putty – 0.5 kg;
- PVA glue – 1 tbsp;
- Water – 100 grams.
Knead the thick mass, pouring water gradually. Since we gave its amount approximately, because it can differ significantly in application with different types of putty.
After mixing, mold the grape and put it to dry for about a day. It should not burst, since the mass with the addition of PVA becomes quite resistant to cracking.
By the way, on the same top picture with shells, you can see the wall below, finished using the technique of decorative strokes. So they need to be made with just such a mixture, based on PVA.
Well, is the grape dry? Let’s make the shape. For this we need:
- 0.5 liters of silicone;
- Plywood box;
- Self-tapping screws;
- Brush.
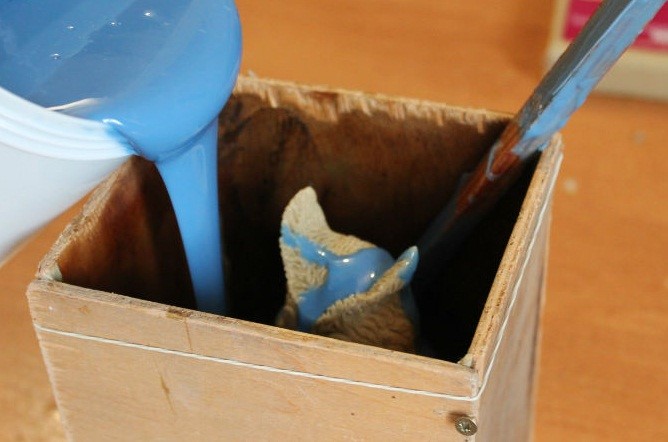
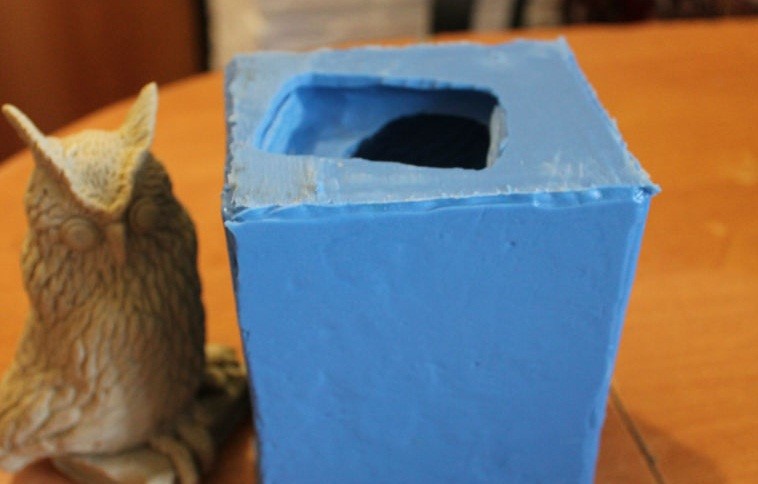
Liquid silicone is sold in hardware stores, and you can pick up any box, you will lay a grape in it and fill it with a silicone mixture.
The main thing is that it can be easily disassembled, and then reassembled with self-tapping screws, and cover the holes with a mixture of silicone. This is necessary so that you can then easily, without damaging, pull out the finished form. If you can’t find a suitable box, you can assemble it from plywood sheets.
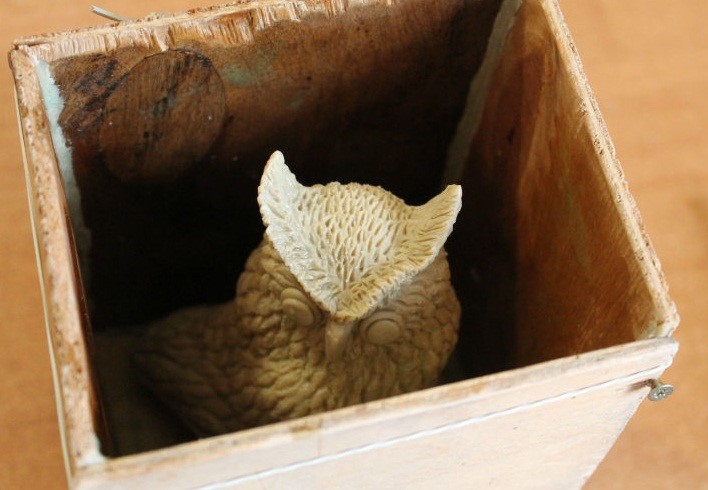
We will show you step-by-step photos using the example of filling a figurine, and you can already put anything there. It is important to understand the sequence here, and that’s all. And the amount of silicone may be different. You need 100 grams per grape, and 1 liter per owl shown below.
So:
- 1 We place the base in the box;
- 2 Fill it with liquid silicone;
- 3 We wait a day until the silicone grabs, then we disassemble the box;
- 4 We take out the base and get a ready-made mold for pouring alabaster.
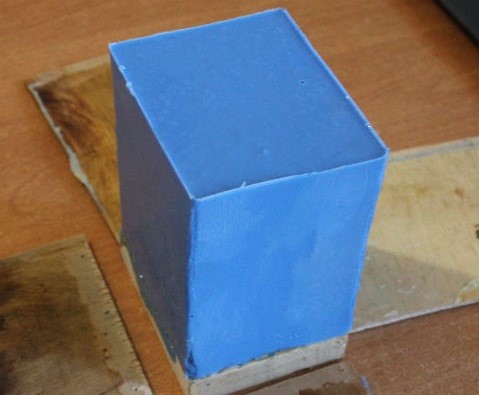
And now let’s move on to the most interesting, the formation of figures from alabaster with our own hands.
How to make alabaster mixture for bas-reliefs
If you are using silicone molds, you do not need to lubricate them. But if you pour gypsum into a plastic paste, then you need to thoroughly lubricate it with sunflower oil.
We do the filling mixture like this:
- 2 parts plaster
- 1 part water
Pour the powder into the water gradually, stirring constantly, avoiding the formation of lumps.
It is not necessary to stir too intensely, there is no point, you will only oversaturate the substance with oxygen and the finished figure may be covered with bubbles.
Then pour it into the chosen shape, flush with its edge. And you rest for about a day.
In general, gypsum sets much earlier. But the longer the figure stays in shape, the stronger it will be and the chance of damaging it by taking it out will be zero.
We fix the bas-relief on the wall
Now the finished composition needs to be fixed on the wall or on a piece of drywall if you want to make a removable bas-relief. In any case, they attach in the same way. You can attach them with liquid silicone or a simple putty.
The main thing here is this: to cover up the cracks between the wall (plasterboard) and the figure, so that it comes out as a single conglomerate. This can also be done with putty.
If there are any irregularities, they must be carefully removed with an abrasive tape. And then you cover the finished painting with water-based paint in a couple of layers.
Pure white compositions on the same background look best, this is a classic version. But you can paint in whatever colors you want, but only then, on top of a layer of white paint.
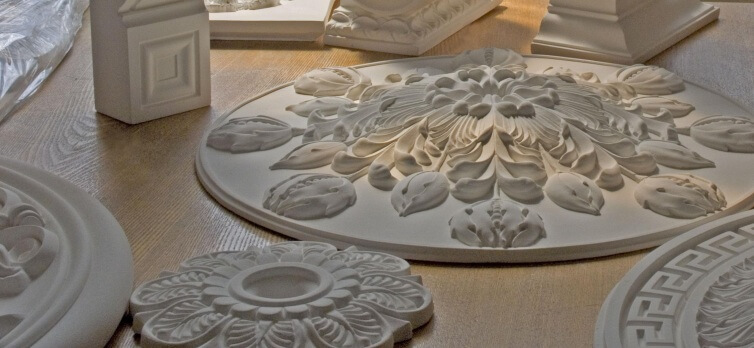
Bas-relief based on molded forms
And here we have already listed everything that may be needed for this particular type of panel:
- Alabaster mix
- Forms
- Drywall base (if it is supposed according to your idea)
- Putty (or silicone glue)
- Water based paint
We already wrote above how to make alabaster mixture, therefore, we will not repeat ourselves, it is better to give you some important recommendations regarding the process.
If you have come up with any composition, then do not rush to immediately glue the elements on the wall.
Better to lay them out on the floor first and see if they look good. After all, several times to remove and glue the workpieces again is not good, they will get dirty and then you will need more layers of paint.
In addition to the elements poured into shapes, you can add various materials to your composition. For example, if you are making a picture with shells, then you can glue ordinary rubble on the wall and paint it white. This will add volume and the picture will look much more interesting.
Bas-relief from ready-made figurines
You will need:
- Picture frame;
- Profile;
- Self-tapping screws;
- Drywall;
- Putty;
- Silicone glue;
- Statuette;
- Choice of decorative elements;
- Water-based paint.
Panels with antique figures must be done within some framework. You can’t just hang it on the wall, it will look ugly. What can you do?
You can fix the picture frame right on the wall, level the inside with it with putty, forming a single whole, then attach a pedestal for the statue (for this it is convenient to use a profile sheathed with plasterboard), which you also putty.
Then put the figurine on the glue and go through all the cracks again to make the view cast. You can add various elements to the space in the frame: pebbles, shells, columns (you can buy them in the pet supply departments, there are many different decorations for aquariums in the form of castles and other suitable beauty style).
And then you just cover everything with paint, including the frame. If necessary, not even two, but three layers. It’s nice that this do-it-yourself bas-relief looks just amazing, but in fact, for beginners it is quite a feasible task.
Bas-relief – painting from putty
You will need:
- Putty mixture for PVA;
- Water-based paint;
- Artistic talent.
And here everything is already in your hands, moreover, in the literal sense of the word. There is no special technique that can be given and everyone will perform it, even without the skill.
The only thing we can say is that you need to make a bas-relief with your own hands from putty in stages.
If you put a large piece on the wall right away, it just won’t hold. The pattern is formed gradually, building up as it dries. And of course, use a PVA-based mixture recipe.
Cover the finished panel with paint and you can invite guests to boast!
Bas-relief of rag flowers
You will need:
- Fabric flowers or spruce cones
- Liquid alabaster mix
- Silicone glue
- Water based paint
The alabaster mixture should be made a little thinner than for filling the figures. You dip the blanks in it and leave them to dry. When they are dry, then dip a second time so that the figure acquires a uniform and monolithic color.
Then you attach them to the wall with glue, and it is easier to paint them from a spray can, with matte paint. Since they are quite fluffy, fiddling with a brush is not very convenient in this case.
Such flowers do not oblige too much to adhere to a strictly defined interior style. For example, if you are making Aphrodite, then you need to duplicate columns or a Greek fresco somewhere.
And in this case, everything will be in harmony: bas-reliefs, any paintings on the walls, any design of kitchen furniture, framed photos, etc.
In conclusion: how to care for bas-reliefs
No matter how much PVA is in the way, a homemade bas-relief, sooner or later, begins to lose its appearance. Gaps are formed between it and the wall and this is normal. You only need to occasionally cover up the cracks and tint these places.
Well that’s all! You know how to make a bas-relief with your own hands from plaster, and there is little to do: start acting.